
Managing tasks with due dates can get chaotic, especially in a team atmosphere. Juggling multiple projects with varying deadlines and dependencies can overwhelm even the most organized employees.
With multiple files, documents and notes being created by each member, a task management software is an essential tool in managing these processes.

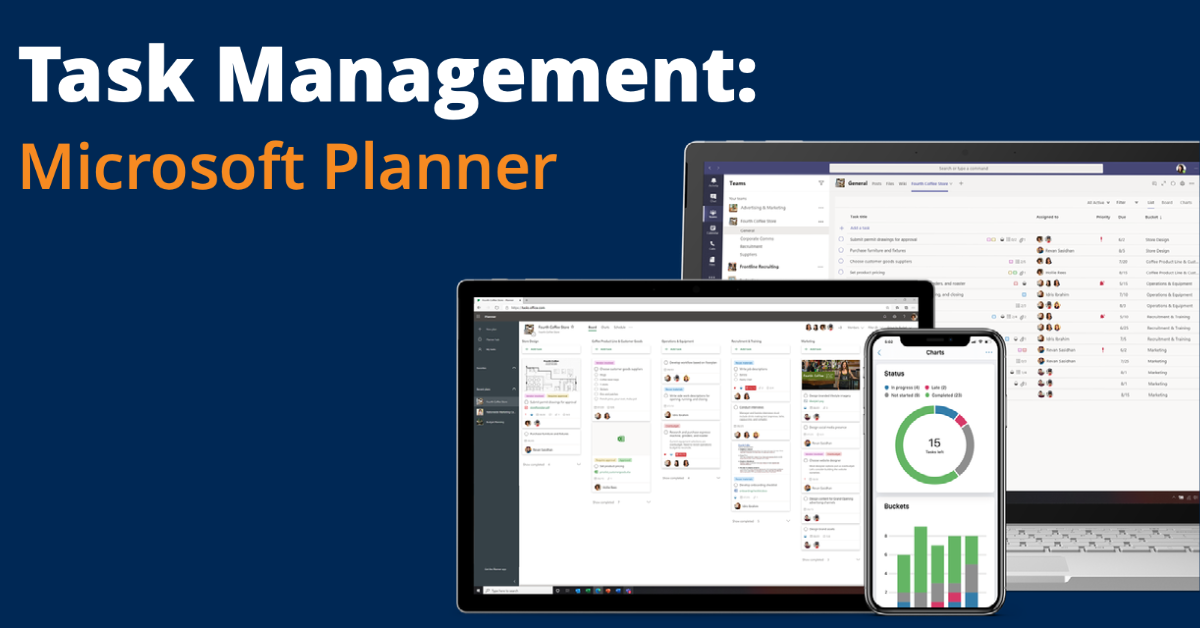
What is Microsoft Planner?
Microsoft Planner is an app available on the Microsoft 365 platform that simplifies task management by giving you a single location to access and integrate your most used apps, communication and collaboration tools, and scheduling and organization.
Planner helps ensure projects get completed and delivered on time. It makes each member of the team improve efficiency, increase workflow awareness, and reduce stress when there’s a lot on the plate. So, another learning curve: figuring out how to use Microsoft Planner.
Have no fear, we’ve compiled our 7 favorite features of Microsoft Planner that you can quickly begin using today to make your task management more efficient.
7 Easy & Useful Features of Microsoft Planner
1. Add Your Planner as a Tab Into ‘Teams’.
Everything else lives in Teams, including your individual tasks from To Do and Outlook. So, it makes sense to integrate Teams with Planner to keep a timeline-driven management system that integrates with your coworkers’ tasks, too. This gives the entire team easy access and awareness of the task and processes involved.
You can also create more than one planner for the same group of people. Rather than adding all of those people individually, if they are already in a plan, you can create a new one using the same group.
Not sure how to use Teams? Marissa breaks it down for you in this webinar.
2. Assign Tasks to Specific People with Due Dates Attached.
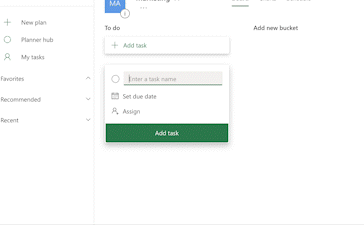
Even the most diligent workers sometimes need to be held accountable, especially when juggling multiple projects with quickly changing priorities. Assigning due dates helps with organization and accountability.
Assigning dates to a task can:
- Hold people accountable
- Minimize confusion (“I thought you were doing that.”)
- Help get tasks completed on time
You can check out our Cheat Code on how to use Tasks for Teams, giving you a comprehensive view of what’s been assigned to you.
Assigning due dates helps each member stay on time and shift project priorities if and when necessary.
You can also due date notifications to your Planner tasks. The notifications feature gives a reminder when your tasks are due, helping you stay organized and on track.
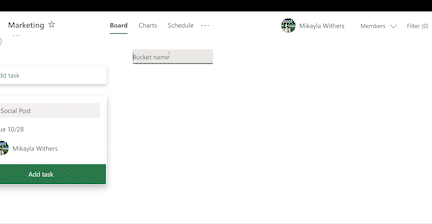
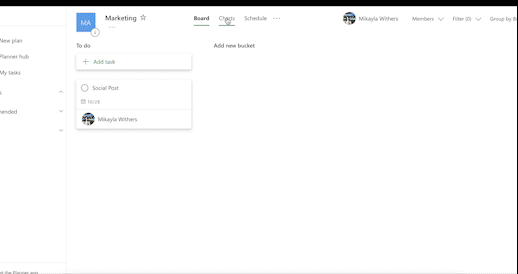
3. Create Multiple ‘Buckets’ in Planner.
With lots of tasks, one list can get really long. And a linear list is not the most efficient way of going about a job. The good news is you can stay on top of things with the Buckets feature.
‘Bucket’ is a fancy way of saying subcategories. Buckets can be customized for the needs of your business. Depending on how you structure your projects, that might look like a Bucket for sub-tasks, different phases of a task, or department type.
Additionally, you can make it easier to view and focus on just a few tasks at a time by using the ‘Group By’ bucket feature.
4. Sync Microsoft Planner with Your Outlook.
What good would any modern software app be if we couldn’t sync and integrate it with our other tools?
Syncing Microsoft Planner with Outlook aligns your calendars, so you never miss a thing.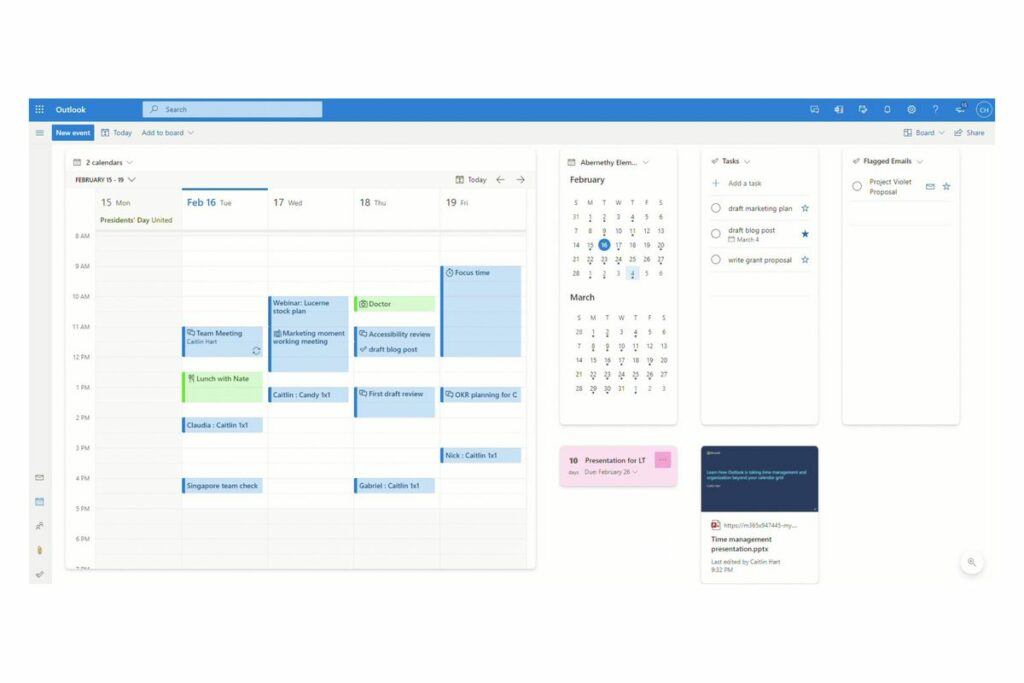
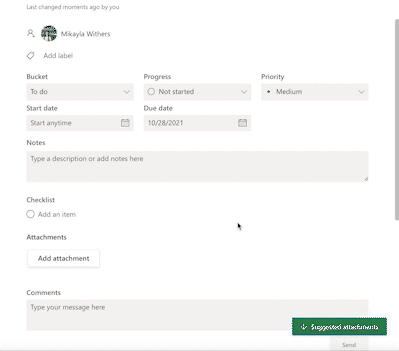
5. Add Attachments, Checklists, and Notes to a Task.
When businesses use multiple software apps for work, it can sometimes be challenging to toggle between the different apps and keep track of everything that’s part of a single task.
By allowing the attachment of documents, photos, links, notes, and more, your Tasks become a centralized area where the whole team has full visibility of everything and can easily collaborate.
When a task in Planner is opened, any attachments or links that are necessary to complete the task will show up within the pop-up box, making it extremely simple for the user to find what they need.
6. Alternate Your View Based on Preference.
Open mind for a different view? Some of us are more visual learners. Many prefer timelines, but some enjoy organizing by charts or boards.
Microsoft Planner lets you choose the view that’s best for you at any given moment. Easily toggle between ‘Board,’ ‘Charts’ and ‘Schedule’ depending on what your focus is at the moment.
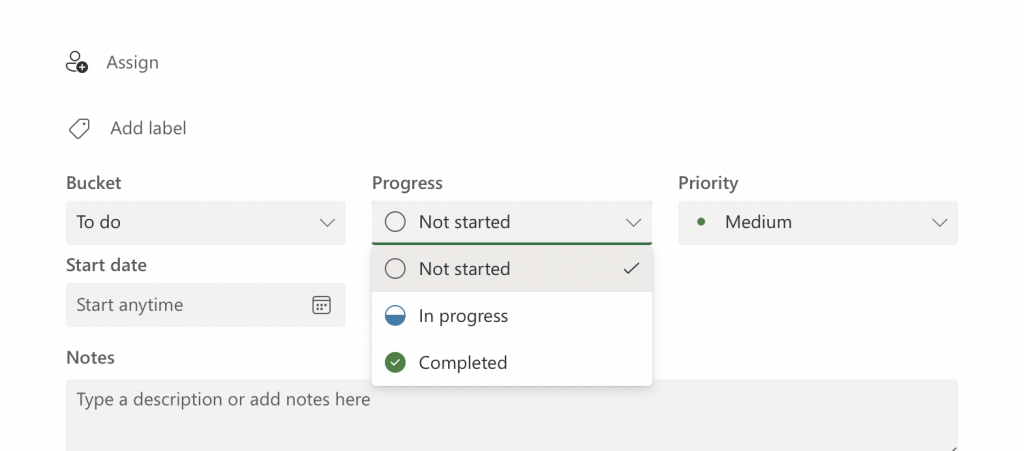
7. Update Your Progress per Task.
There are three different options to track your progress: Not started, In progress, and Completed.
Keeping your to-do’s updated with the correct status can help the rest of your team members stay in-the-know about other projects going on. It can also help keep you organized when it comes to figuring out how much time you should delegate to each individual task.
Use Microsoft Planner to Stay Organized and Efficient
This basic overview of Planner will help you quickly integrate all of your Office apps (including Teams and Outlook) for both solo and team task management. Learning how to use Microsoft Planner gives everyone a centralized location to view and manage projects, stay organized, and be sure everything gets completed on time.
At WorkSmart, we help small businesses use the full functionality of Microsoft 365 to empower employees and fuel growth. Simple, trusted solutions improve the quality and effectiveness of work while ensuring your organization’s security.
To learn more about how we can help you integrate Microsoft 365 into your workplace, click here.